This easy recipe for grilled sweet peppers is SO simple, and that’s the real beauty of it. This cooking method highlights the product’s best features and provides a perfectly sweet, almost caramelized flavor.

Whether working with mini peppers or large ones, this is my favorite method to cook them. Perfect at a summer barbecue, they can easily slip onto the grill and get charred alongside the other elements.
If you want to get more into grilling, check out my full grilling series. Another delicious grill-based recipe is this grilled Russet potatoes. While we are on the topic – these whole grilled eggplants and grilled cabbage wedges are so good!
Jump to:
Why you’ll love this recipe
- It's a 15-minute dish: Perfect for midweek or midsummer, last-minute gatherings.
- No prep or dishes: These grilled sweet peppers are the ultimate minimalistic dish. All you need is a bowl and a set of tongs. There will be barely any wash-up once you’ve chucked the skins away.
- No extra equipment needed: You won't even need a grill basket.
- It can slide easily onto your grill: No matter what is already grilling there. As the skins get peeled off, it doesn’t really matter what they come into contact with.
- Digestible: The skin comes off easily after grilling, making it easier to digest. The cooked flesh beneath the skin is soft and velvety.
- Leftovers: For bowls and salads. If you have any leftovers, pop them in this chimichurri bowl or this puy lentil salad.
Key ingredients and substitutions
- Sweet peppers: Choose sweet peppers of various colors, such as red peppers, orange, and yellow peppers. Add green bell peppers, and you’ll have a rainbow. Choose firm, glossy peppers and free from any blemishes or soft spots. You can use large or small peppers – the cooking time must be adjusted accordingly.
- Olive oil: It has a high smoke point with a mild flavor, perfect with sweet peppers. It also helps in preventing the peppers from sticking to the grill. Alternatively, you can use other high-smoke point oils like avocado oil.
- Sea salt: Opt for coarse sea salt or kosher salt for better control over the amount of salt you're using. It also adds great texture.
Elo’s tips
- If one pepper starts to get a little too black, place it at the back of the grill or slightly offside to the burner.
- If you’re using regular red bell peppers and not the sweet pointed ones, cut them in half before placing them on the grill for them to cook quicker.
- Do not run the peppers under cold water to remove the seeds as it decreases their flavor.
- Add a little raspberry or balsamic vinegar on top after peeling the peppers if eating them as a side.
How to grill peppers (step-by-step instructions)

STEP 1: Prepare the peppers. Wash the sweet bell peppers and pat them dry with a paper towel. Coat them with some oil and preheat the grill to medium-high heat.

STEP 2: Cook the peppers. Place the whole peppers on the hot grill grates and close the grill lid.

STEP 3: Flip the peppers as you go. Cook them for about 10 minutes or until they have blackened. You will know they are ready when they feel squishy when you touch them with tongs. Transfer them to a large plate and serve with fresh basil leaves and salt, or peel them.

STEP 4: Peel off the skin. To make it easier, you can steam the peppers as soon as they come off the grill by placing them in a large bowl that you cover with a towel or plastic wrap, or place them in a plastic bag. Once cool enough to handle, peel the peppers (see video) and discard the peeled skin.
How to peel peppers
Start peeling the pepper wherever the charred skin is a little loose. Gently tear on those loose, charred bits and whole ribbons of skin should come off easily. Then, cut the pepper in half by inserting a paring knife at the pointed end and slicing it along the sides towards the top. Make a straight cut right under the core and remove it as a whole (stem + seeds). Finally, remove the white membrane on the inside. See video for visual instructions.
Equipment
- I’m using a Weber gas grill from the Genesis II series with 4 burners but any gas grill will work. You can also cook the peppers on a charcoal grill, flipping them more often and watching them carefully.
- Grilling tongs
- Large mixing bowl
Serving suggestions
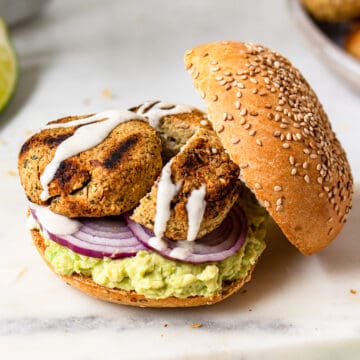
- Grill the sweet peppers alongside these vegan black bean burgers and Russet potatoes
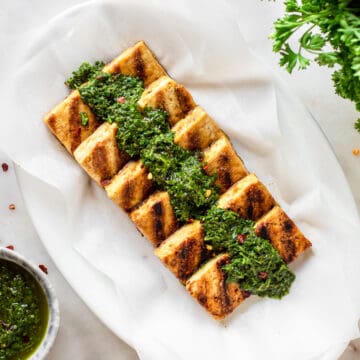
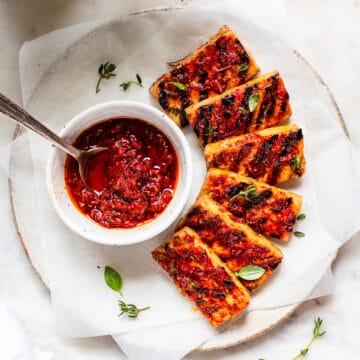
- Serve them with grilled tofu: try this spicy harissa tofu or this herby chimichurri tofu
- Make them part of a grilled vegetable platter
- Serve them as an easy summer appetizer with crusty bread or this homemade seed bread
- Use the peeled peppers in fajitas, vegan wraps, grain bowls, and pasta salads (e.g., this red pesto pasta salad)
Frequently asked questions
Sweet peppers have an elongated shape and thinner skin. They come in a variety of colors and are particularly sweet, especially after grilling.
Not necessarily, if you don’t mind the skin of the peppers, you can totally leave the skin on. Many people find the smooth texture of peeled peppers more enjoyable and more digestible. I also find that the flavors and sweetness are intensified when the peppers are peeled.
You can store them in an airtight container in the refrigerator for up to 5 days. You can also layer them in a Weck jar or Mason jar with olive oil (make sure there are no air bubbles and finish with a layer of oil) and keep them in the refrigerator for 3 months. The third option is to quick pickle them following my vinegar pickling guide.
Yes, in freezer bags for 3-6 months. Don’t overcrowd the bags, and squeeze out as much air as possible to prevent freezer burn. Make sure to lay them flat in the freezer. If possible, freeze them on a parchment-lined baking sheet where they don’t touch each other first, then transfer them to a freezer bag. That way you’ll be able to access them individually.
Don’t forget to join the Cooking With Elo newsletter. You’ll get gluten-free and vegan dinner ideas sent right to your inbox.
The recipe
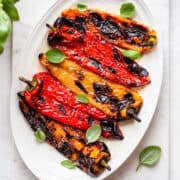
Grilled Sweet Peppers
Ingredients
- 4 sweet peppers
- 2 tablespoons olive oil or preferred oil with a high smoke point
- 1 pinch of sea salt
Instructions
- Preheat the grill to 400-475°F (200-250°C).
- Prepare the peppers. Wash the sweet peppers and pat them dry with a clean dish towel. Brush them with a little bit of oil.
- Grill. Place the whole peppers on the grill. Close the lid and grill for about 10 minutes until blackened and blistered. Flip them at halftime. They are ready once they feel squishy when grabbing them with tongs.
- Steam the peppers (optional). Remove the peppers from the grill and place them in a large bowl that you cover with a clean dish towel. Let them rest for 10-15 minutes. The steaming process will make it much easier to peel off the skin. If you don't want to steam the peppers, let them cool for 10-15 minutes.
- Peel the peppers. Tear off the skin with your fingers. It should slip right off. Then, cut off the core and remove it as a whole with the seeds.
- Serve. Sprinkle with sea salt and serve immediately or place in an airtight container for later.
Notes
- If one pepper starts to get a little too black, place it at the back of the grill or slightly offside to the burner.
- If you’re using regular red bell peppers and not the sweet pointed ones, cut them in half before placing them on the grill for them to cook quicker.
- Do not run the peppers under cold water to remove the seeds as it decreases their flavor.
- Add a little raspberry or balsamic vinegar on top after peeling the peppers if eating them as a side.
- Storage: You can store the peeled peppers in an airtight container in the refrigerator for up to 5 days. You can also layer them in a Weck jar or Mason jar with olive oil (make sure there are no air bubbles and finish with a layer of oil) and keep them in the refrigerator for 3 months.
Nutrition
Equipment
Leave a star rating and review below. Thank you!
Loved it? Please rate it!
If you tried this recipe or any other recipe from the blog, make sure to let me know how you liked it by leaving a star rating and a comment below. Your feedback really matters! To never miss a recipe, follow me on Instragram, Pinterest and Facebook.


Did you like this recipe? Let me know!